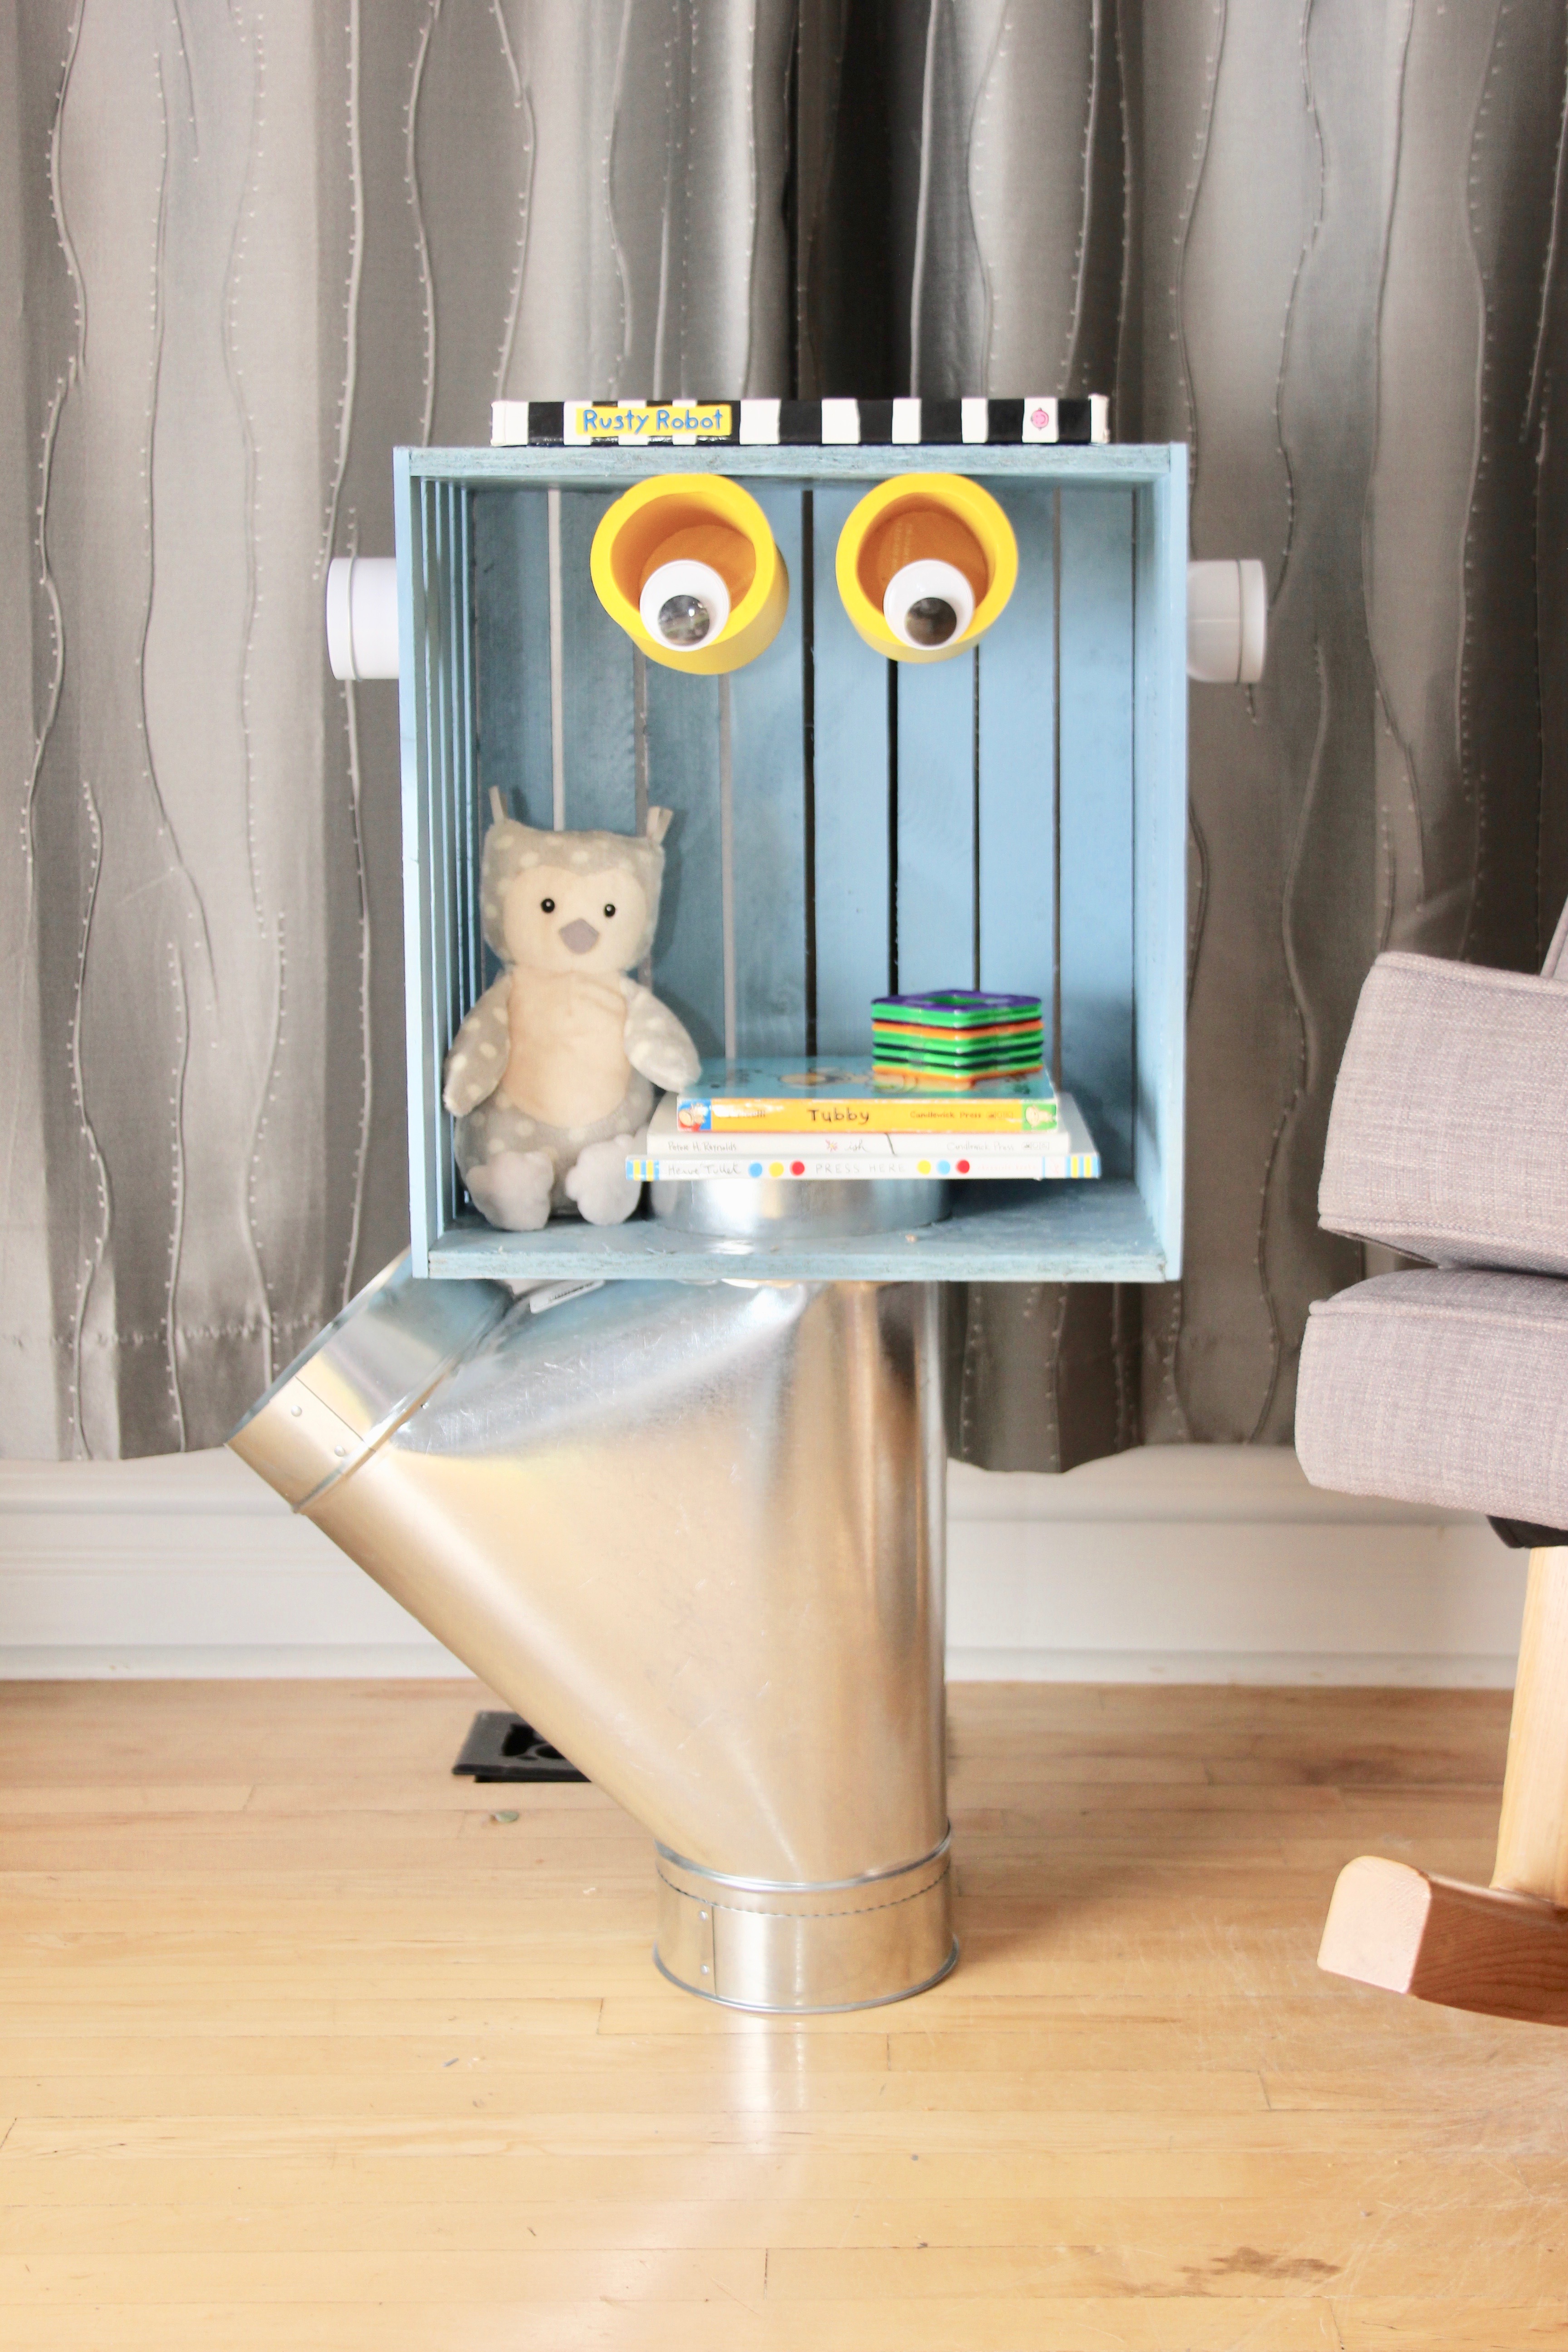
Robot Nightstand DIY
Hi, friends! I recently made this DIY Robot Nightstand for The Edmonton Fall Home Show’s Notable Nightstands Challenge, in support of Habitat for Humanity. (People could bid on DIY nightstands created by local bloggers.)
Now, I want to show you how to do this yourself. I created mine for under $50, paint and glue included. (I picked up the crate and duct pipe at the Habitat for Humanity Restore for really cheap, so if you’re buying these pieces brand new, your project cost may be a little bit higher.)
 You’ll Need:
Materials:
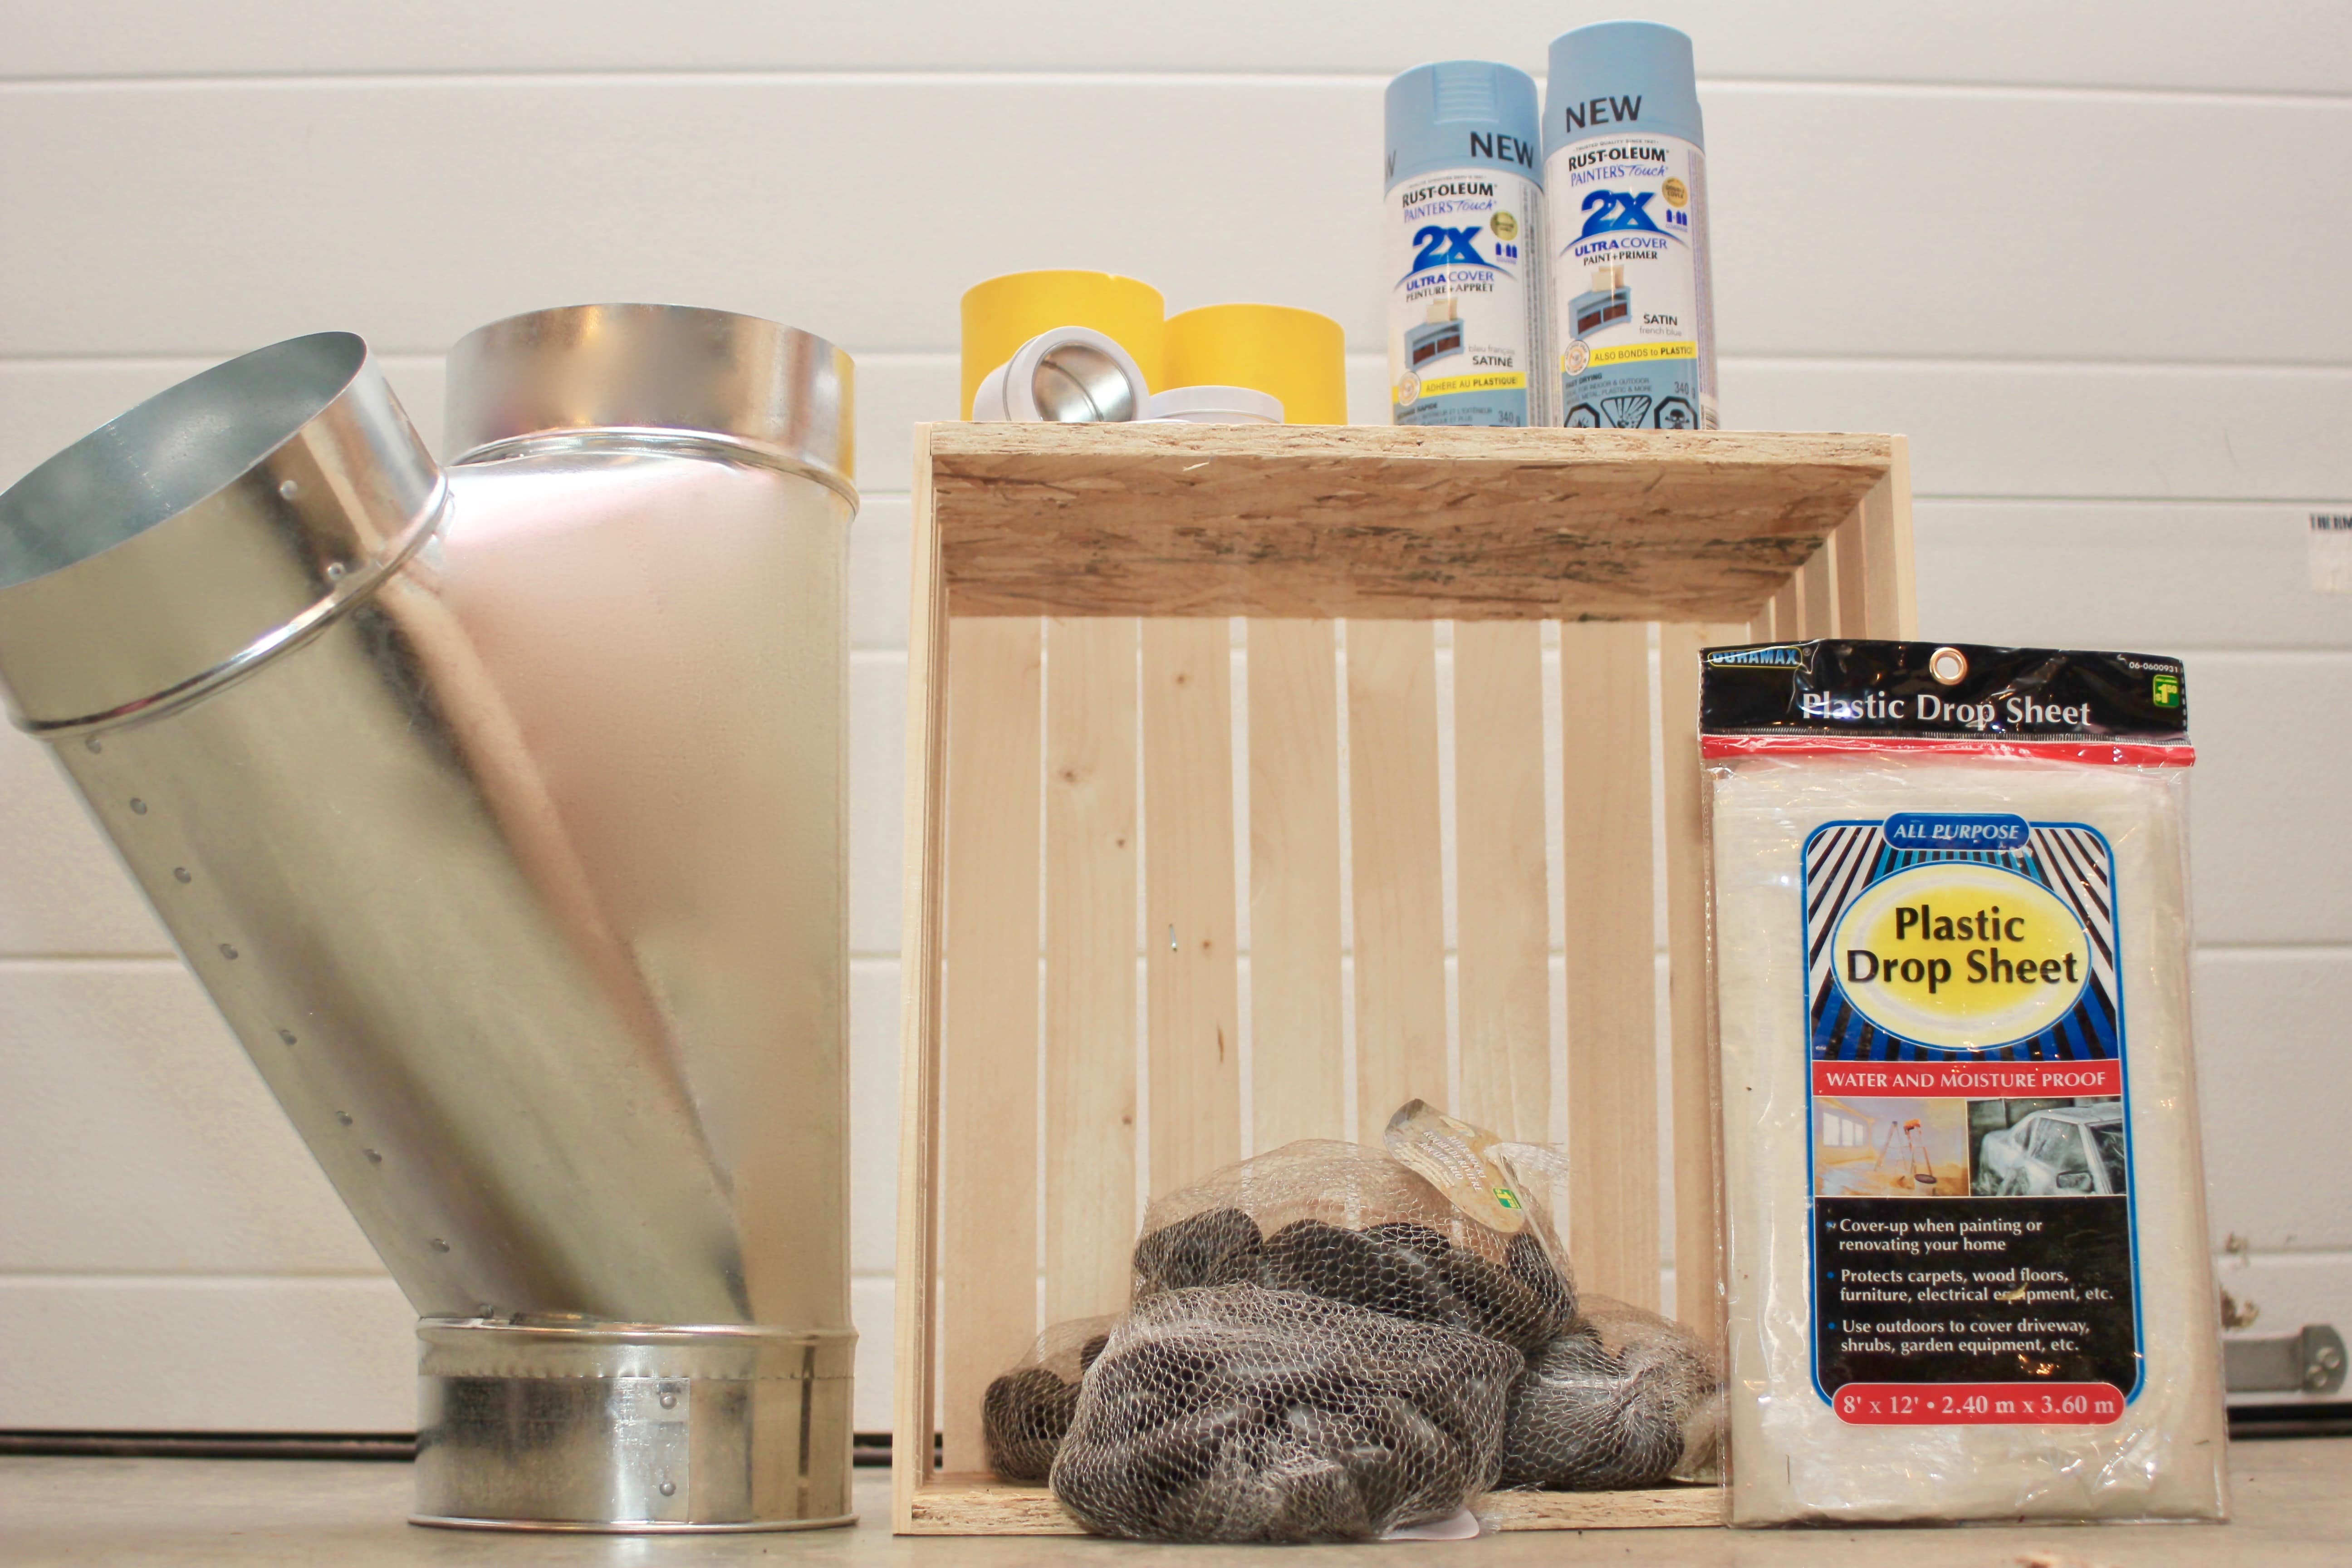
- wood crate
- Rustoleum Ultra Cover Paint and Primer in Satin French Blue (I used about a half-can of paint)
- Ducting Wye with caps (I used 6″ x 6″ x 6″)
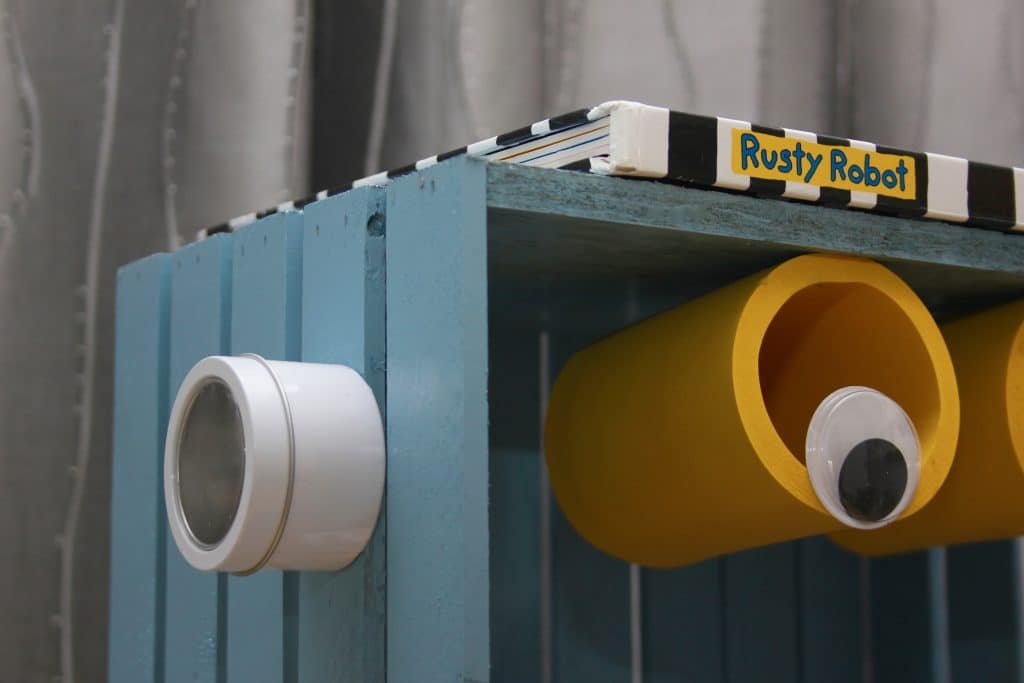
- Two yellow foam can hugs (for the eyes)
- Googly eyes
- Two small white storage tins (for the ears)
- Four bags of decorative black rocks
- Heavy Duty Glue
Tools:
- sander
- clamps
- jigsaw
- staple gun
 Directions:
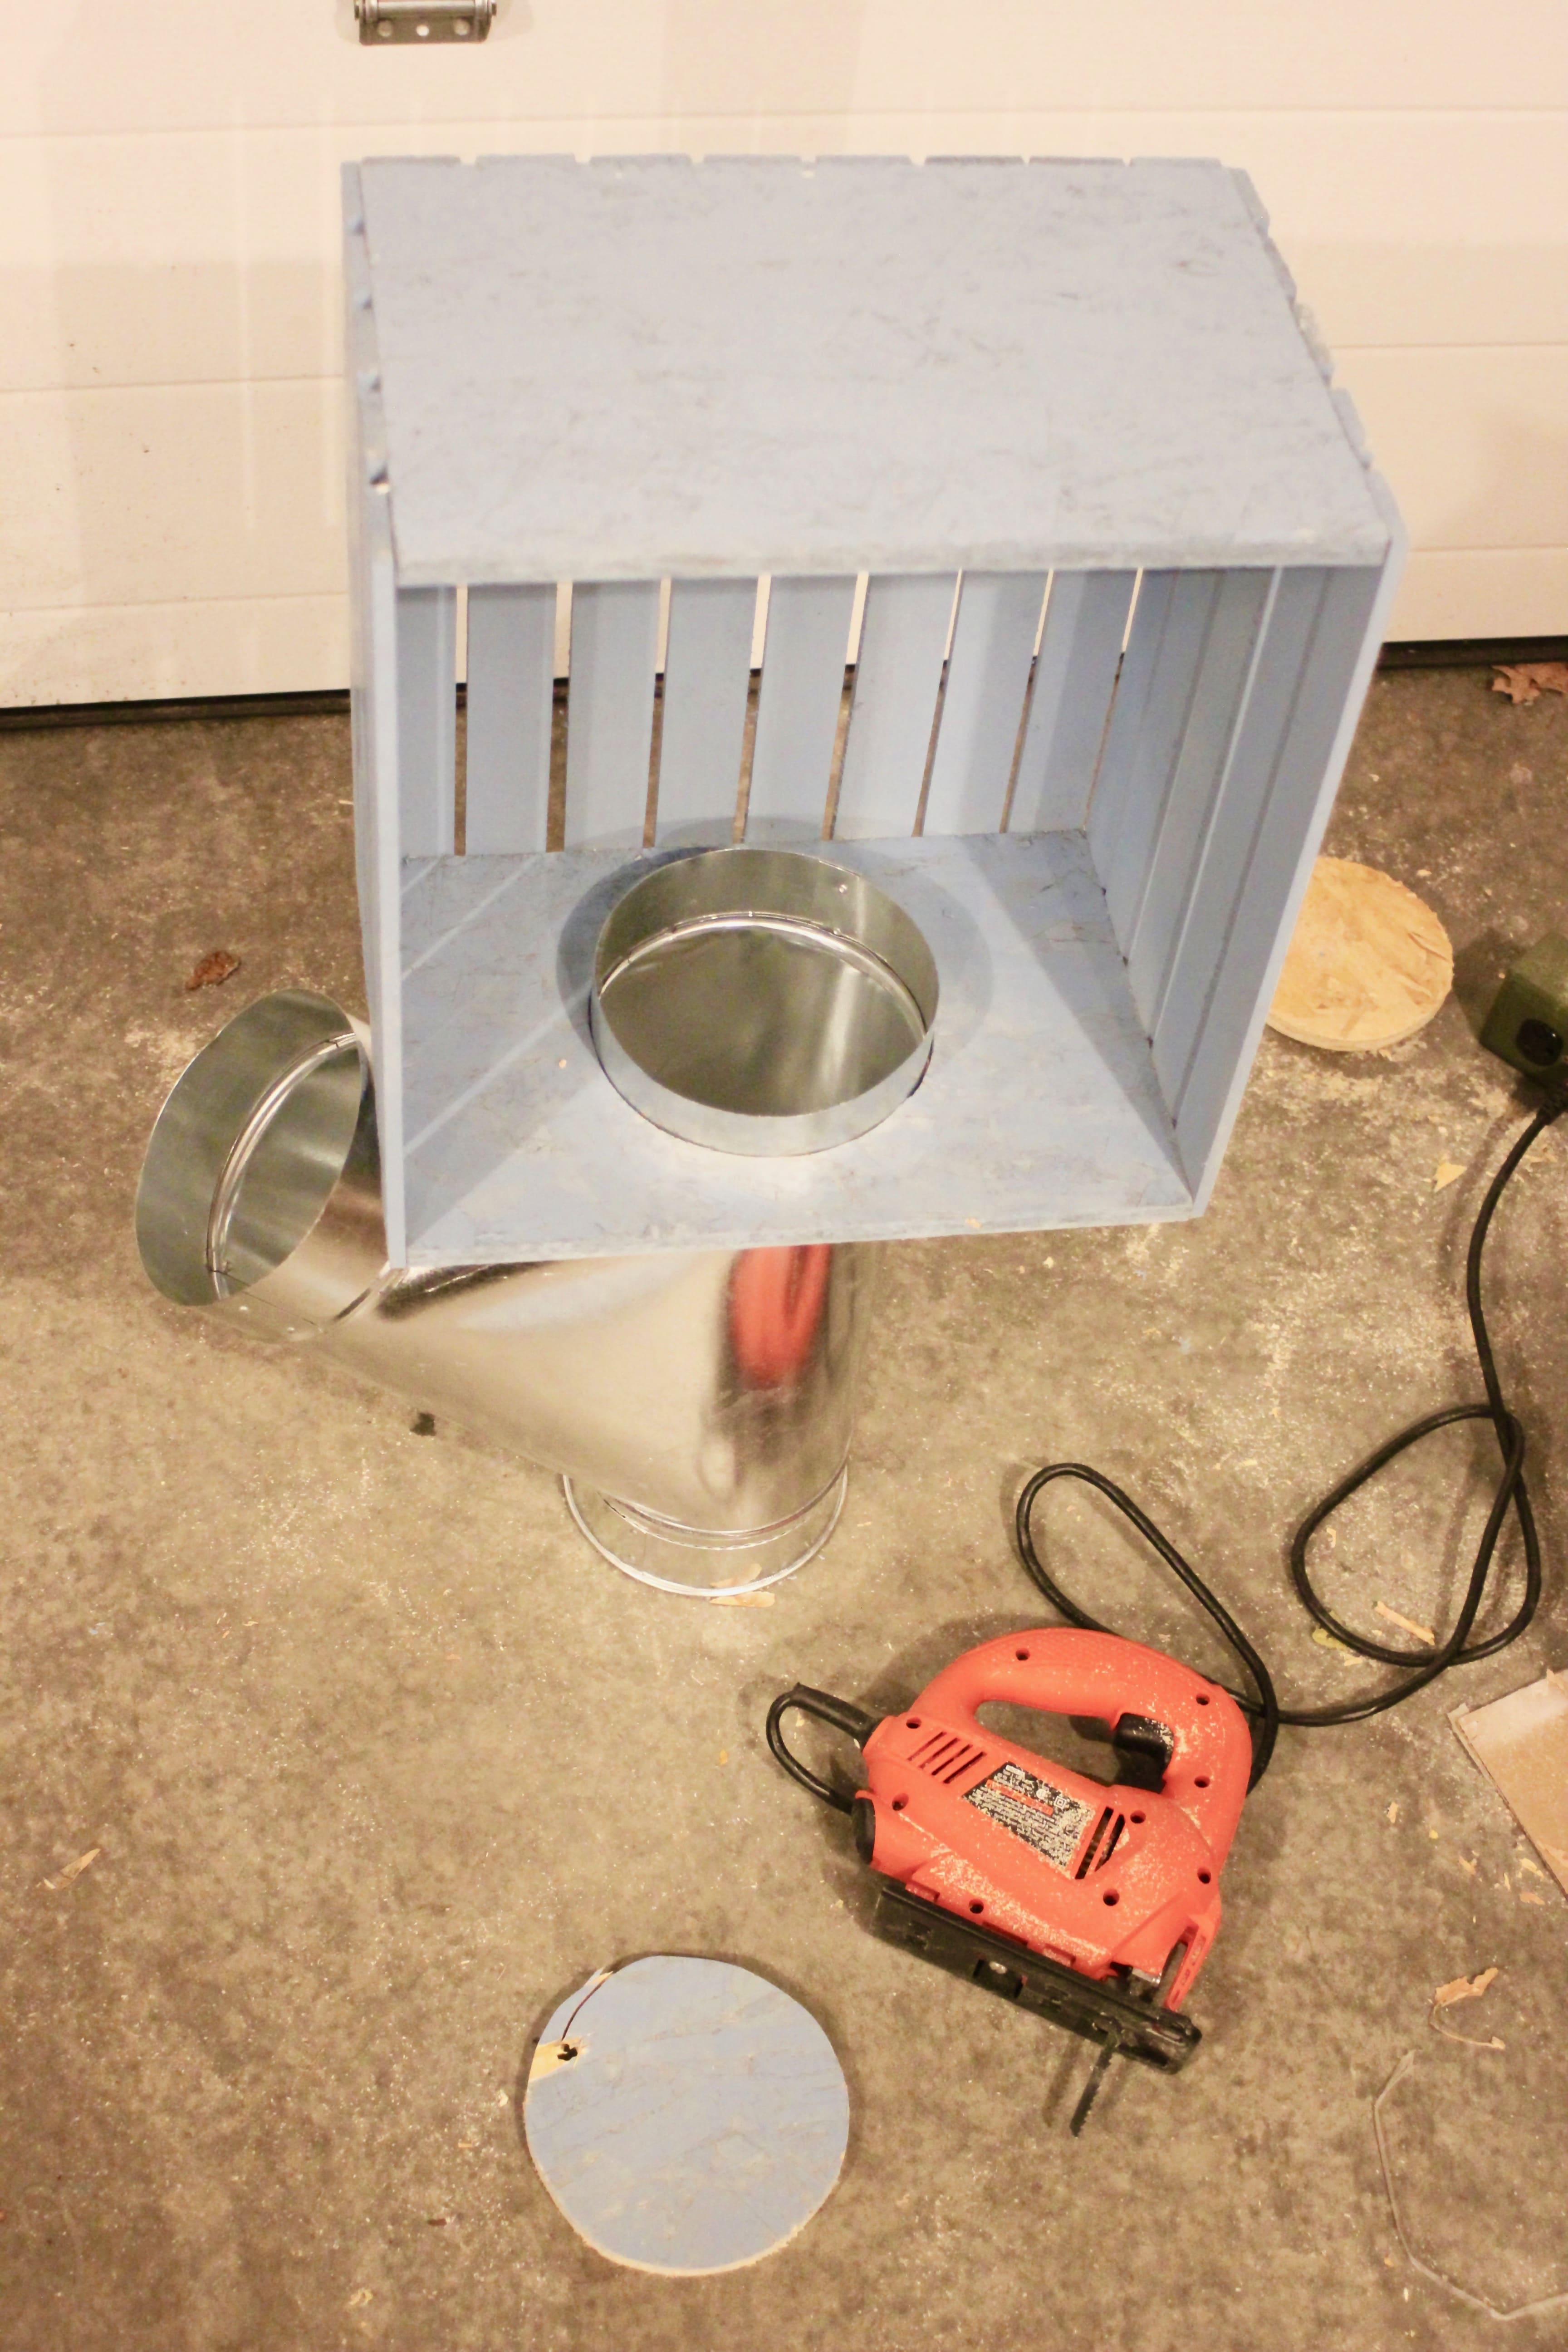
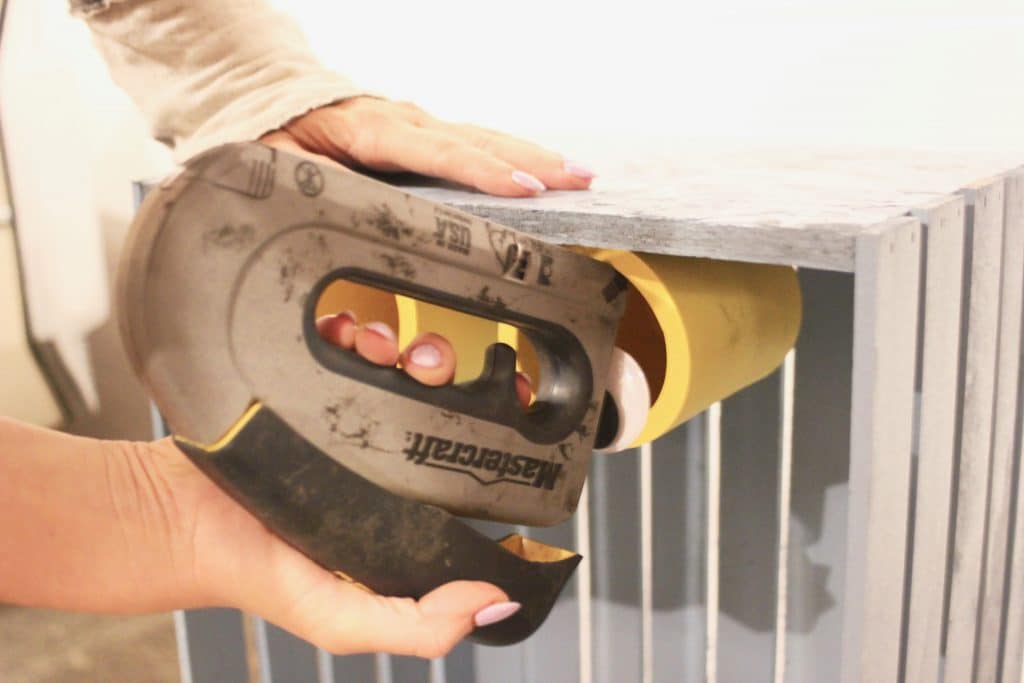
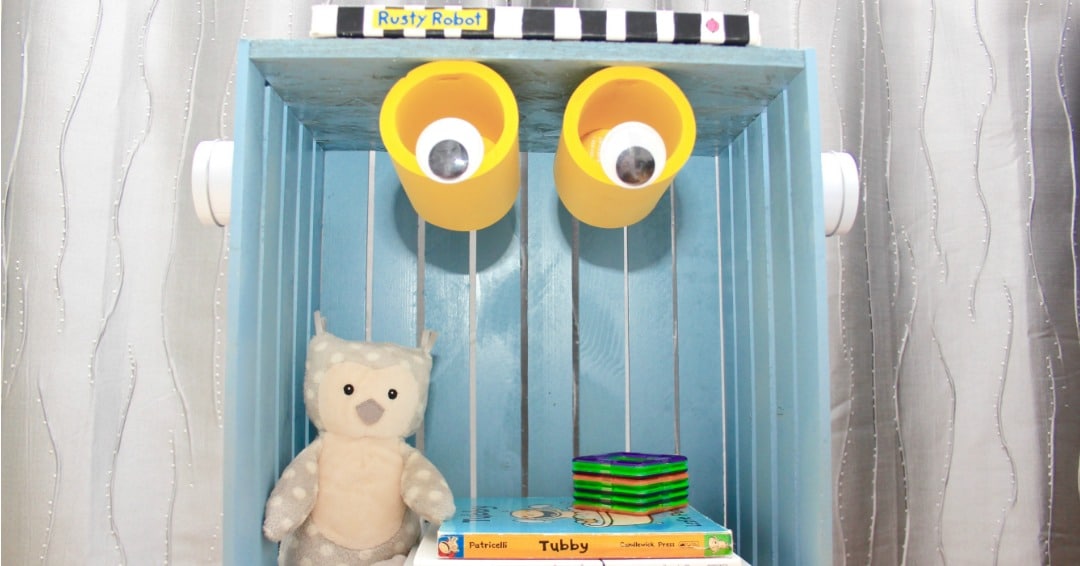
Lightly sand your wood crate box, then spray paint it. I did two coats, waiting an hour in between each. Then, I let the paint dry for 24 hours, just to be safe. While you’re waiting for the paint to dry, you can glue the googly eyes to the yellow foam can hugs. I picked mine up at Michaels for $3 total.
Next, cap the standing leg of your duct pipe. Once your paint is dry, use a jigsaw to cut a hole that snugly fits the end of the duct, and slide the crate through the hole. You can cap the other two ends but I chose to leave them open – kids love little spots to store stuff!
Next, fill the duct pipe with something to stabilize the piece. I used four bags of decorative black rocks I found at The Dollar Store, but feel free to use whatever you think will work. Once you’ve stabilized the piece, use a staple gun to fasten your robot eyes to the box.
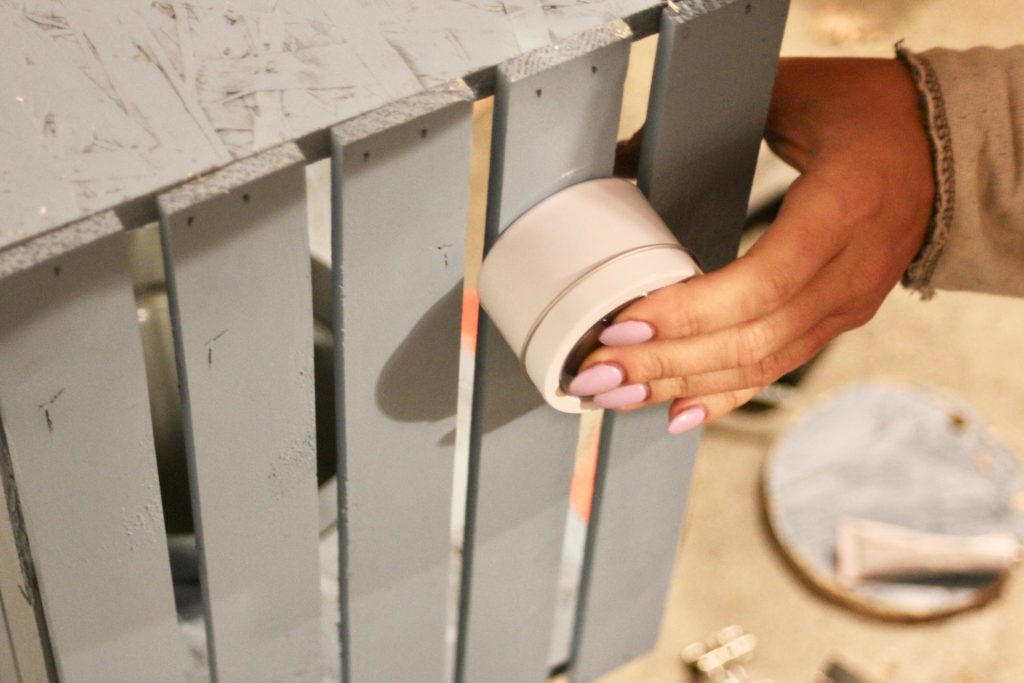
 Your final step is the ears. Glue one tin at a time to the sides of the crate (I used this glue). Clamp the tins to the crate until the glue dries. I left them overnight to make sure they were really on there! I also chose these specific types of tins with lids, again, because kids love little spots to put their knick-knacks. It’s one of many ways you can make your piece more fun and interactive!
That’s it! I hope you find this as simple as I did. I would love to see your finished pieces, so please feel free to tag me on social media.
Find more of my DIY projects- here!
This post was sponsored by Rust-Oleum Consumer Brands Canada. As always, creative design, ideas, and opinions are my own.
xx


Leave a Reply